Engraving Forum.com - The Internet's Largest and Fastest Growing Engraving Community

The Internet's Largest and Fastest Growing Engraving Community
Discuss hand engraving using basic to the most advanced methods and equipment
Forum Members: 14,732. Welcome to our newest member, Miss Allison
EngravingForum.com - Domain since Feb 7, 2003

Graver Video Conferencing is empty Join now!


Go Back   Engraving Forum.com - The Internet's Largest and Fastest Growing Engraving Community > Forums > Lindsay AirGraver Info - Hand Engraving Forum
ENGRAVING TOOLS - Paypal accepted Classes Glossary Feedback Tips Sharpening Bulino Videos Forum Policies

Reply
 
Thread Tools
  #1  
Old 01-27-2013, 10:59 PM
Steve Lindsay's Avatar
Steve Lindsay Steve Lindsay is offline
Administrator
 
Join Date: Feb 2006
Location: Kearney, NE
Posts: 4,552
Default Engraving Tutorials: On-Demand

This is a list of the available on-demand tutorials. They are also listed at
http://www.engravinglessons.com/On-D...0Tutorials.htm


On-Demand Engraving Tutorials
The "On-Demand" tutorials will automatically take you through paypal for payment. After payment you will receive access to the tutorial you purchased for 30 days. You may print the tutorial and keep it for a personal reference.

Sculpted engraving step by step tutorial - Ray Cover
This tutorial takes you step by step through Ray's process of creating sculpted scrolls that he used on his Dante's Inferno theme knife. This covers the tools needed as well as the step by step methods. Ray used a three step process for this sculpting. The initial carving with gravers, refining the shape with punches, and finishing with stones and polish. All three of these procedures are covered in detail. Ray also gives a short description of alternative methods. You also get to see how to create the raised domed panels for doing bulino scenes or other engraving on.
Please note that this tutorial covers the sculpting portion of this project only. The bulino part of the project is not included.
5618 words, 75 images
Sculpted engraving step by step tutorial
Price $25
Purchase by selecting the tutorial here
After purchase you will be able to see the tutorial at this link.
Sculpted engraving step by step tutorial


How to Scrimshaw with a Lindsay AirGraver - by Ray Cover
This tutorial covers doing scrimshaw with a power tool. Power tools make the work easier and faster for carpenters, mechanics, artist, etc. This is no different. Using your AirGraver as a power tool greatly speeds up the scrimshaw process. There are two projects in this tutorial that cover both line scrim and dot/stippling scrim. Ray covers both tools and process. The tools are very simple and there are only a few that you need. (click images to enlarge)
3387 words, 45 images
How to Scrimshaw with an Airgraver
Price $20
Purchase by selecting the tutorial here
After purchase you will be able to see the tutorial at this link.
Ray Cover's How to Scrimshaw with an AirGraver

Learning to design an engraving layout with Photoshop
by Roland Baptiste (French and English versions)
approx. 1200 words, 85 images

In this tutorial I will show you the way to create step by step a drawing project like it isn't possible with a pencil. You will learn the essentials tools to use Photoshop in this kind of work. This tutorial can be apply on all works and projects. Here, I show you a gun drawing but it is the same proceed for a knife, pen,... everything else. I have learned to draw and engrave
with the classics (old) methods and techniques like you always learn today in the school. I think the new technology is the way to following when it is to make better work and only if it is better and here it is incomparable in the finesse and property work finish. It isn't because you use the computer, binocular or AirGraver that it isn't a hand made, it is just an other way to create what you want with
the best quality that you can obtain without machine. It is the logic evolution of the hand engraving and it is the progress for the best... like I love it. Roland Baptiste


Frency
Dans ce tutoriel je vous montrerai le chemin à suivre pour créer pas à pas un projet de gravure sous forme de dessin comme il n'est pas possible de le faire avec un crayon et du papier.
Vous apprendrez à maîtriser les outils essentiels pour utiliser Photoshop dans ce genre de travail. Ce tutoriel peut être appliqué sur tous travaux et projets. I
ci, je vous montre un dessin sur un fusil mais c'est le même procédé pour un couteau, stylo,etc... J'ai appris à dessiner et graver avec les méthodes et techniques classiques (vieilles) comme vous l'apprenez toujours aujourd'hui à l'école.
Je pense que les nouvelles technologies sont le chemin à prendre lorsque c'est pour réaliser un meilleur travail et seulement dans ce cas; et ici, c'est incomparable au niveau de la finesse et de la propreté du travail. Ce n'est pas parce que vous utilisez un ordinateur, binoculaire ou l'airgraver que ce n'est pas du travail fait main, c'est juste une autre voie pour créer ce que vous voulez avec une des meilleures qualités que vous savez obtenir sans machine. C'est la logique de l'évolution de la gravure main et c'est le progrès pour le meilleur... comme je l'aime.


Approx. 1200 words, 85 images
Learning to design an engraving layout with Photoshop by Roland Baptiste (Access to both French and English versions)
- Price $25
Purchase by selecting the tutorial here
After purchase you will be able to see the tutorial at this link.
Roland Baptiste's Tutorial Learning to design an engraving layout with Photoshop (French and English versions)
Note: Roland's tutorial above is included inside his book "Learning Gun Engraving".

Ray Cover's knife engraving step by step through a project

Ray Cover's step by step knife engraving process. Follow me through an actual project step by step. The purpose of this tutorial is ti show the process that I go through
when engraving a knife. I cover every step from start to finish.
I start with what to do with the knife when it arrives at the studio
and move on from there including how to prep the knife for engraving,
how I get the outline for the design, my drawing process for the
design, transfer of the design, cutting the initial outline, etc,
etc, all th
e way through the process of this knife project.

The tutorial ends with a photo of the finished knife and a jpeg of the transfer I used for the engraving (that can be printed out and used for practice if you wish). I also give photos and info on some of the specialty tools I use along the way.
This tutorial is knife specific and deals directly with the process for engraving a custom handmade knife.
It is not a general engraving tutorial where I teach you how to s
harpen a graver, make a cut, cut a scroll etc. I have another tutorial here on shading. Those same principles of shading were used in this tutorial. I have tutorials on gold inlay, tool sharpening, etc. in the works that I hope to have available soon. While all those skills are shown here I do not follow those side topics in detail here. Here we are dealing with the process and procedures I use to engrave custom knives.

I hope you enjoy it, Ray
3025 words, 83 images
Knife engraving step by step through a project - Price $30
Purchase by selecting the tutorial here
After purchase you will be able to see the tutorial at this link.
Ray Cover's knife engraving step by step through a project

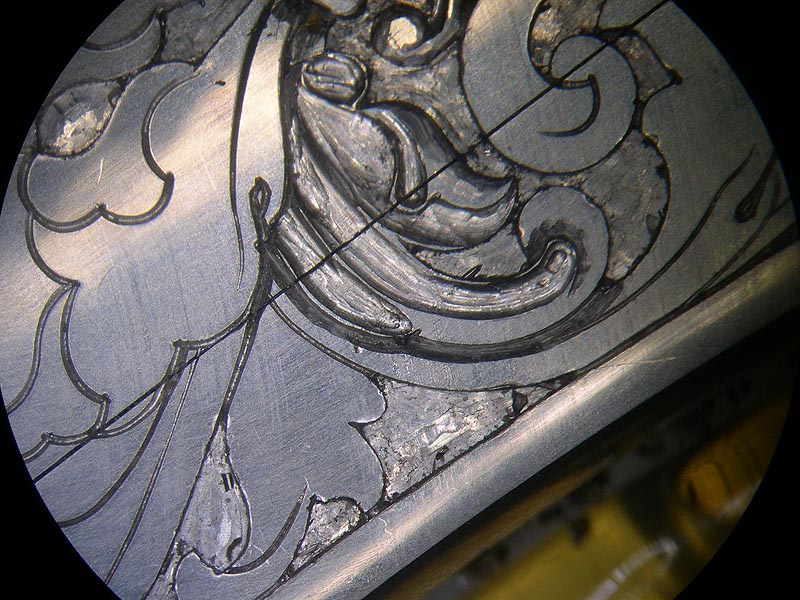
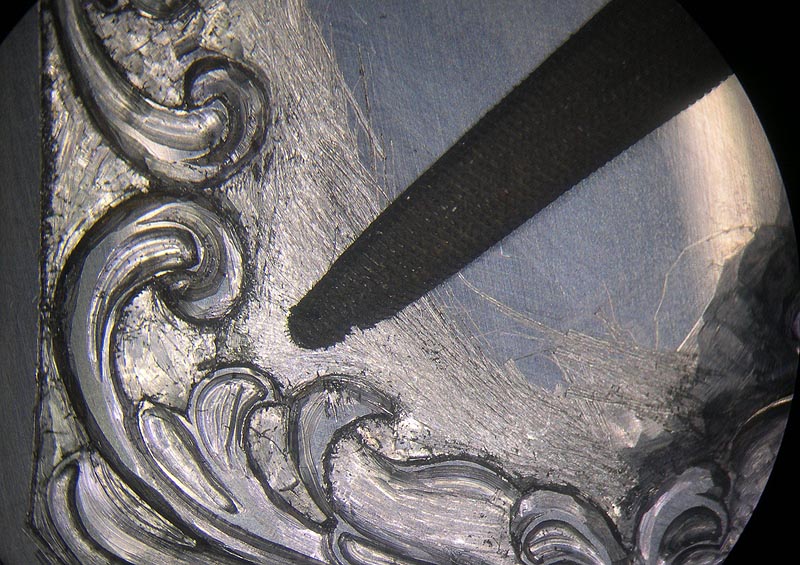
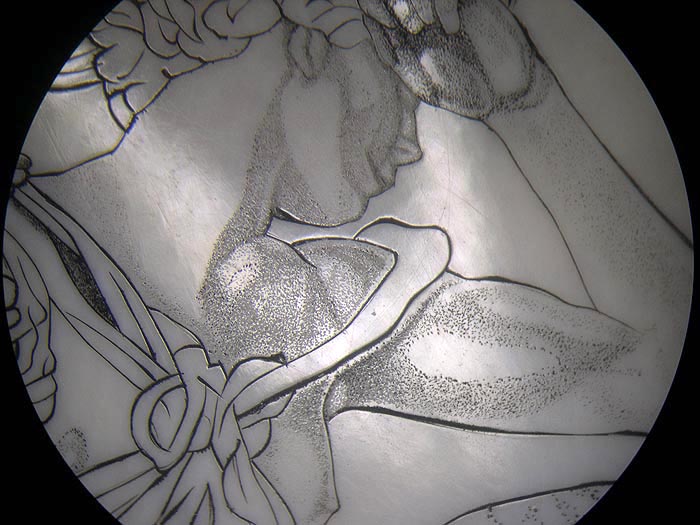
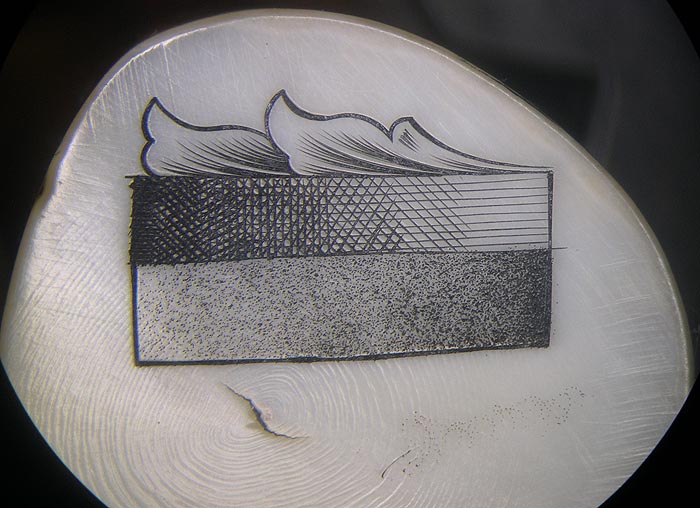
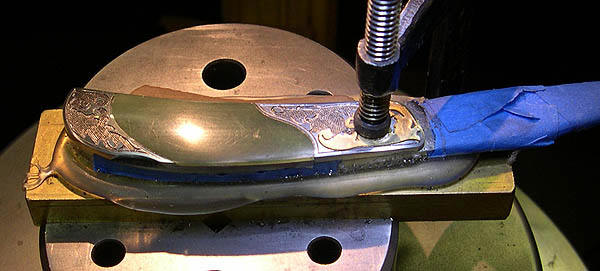
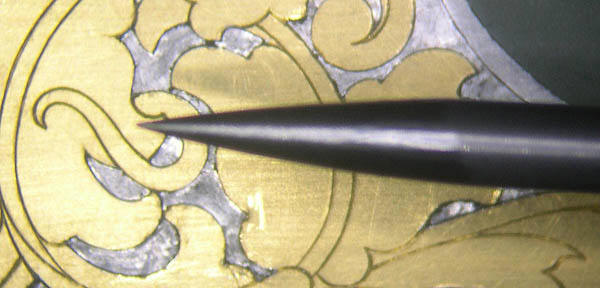
Basic scroll shading for traditional scrolls by Ray Cover
This tutorial takes the learner step by step through Ray's method of
shading as it is applied to basic scroll forms. In this tutorial Ray
shows you how to use his shading method to shade both a Nimschke type and a McKenzie type scroll. Approx. 2800 words, 23 images.


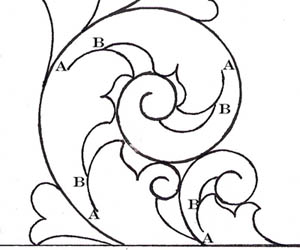
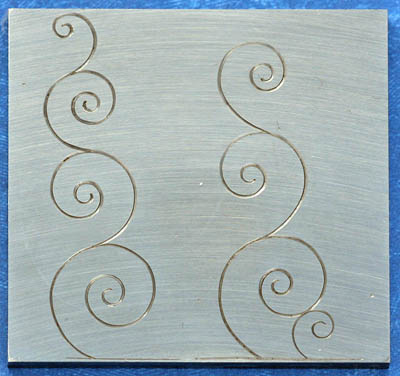
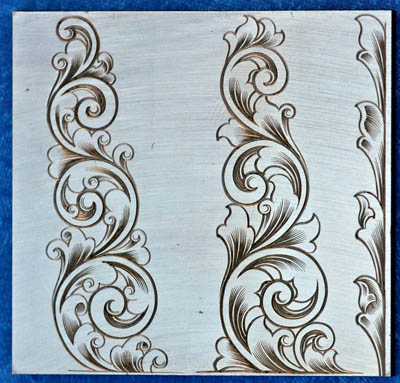
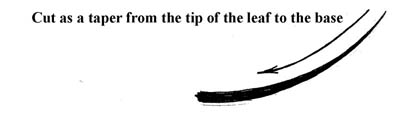
Basic Scroll Shading for Traditional Scrolls
- Price $20 Purchase by selecting the tutorial here
After purchase you will be able to see the tutorial at this link.
Ray Cover Scroll Shading Tutorial
About Ray Cover
Ray Cover is an engraver of fine firearms who also has a following of people who collect his work in the high end knife, pen and fly rod markets. Ray teaches classes in his studio in Festus, Missouri.
Visit http://EngravingClasses.com for Ray's scheduled classes
Click here for Ray's Engraving photo gallery on his website


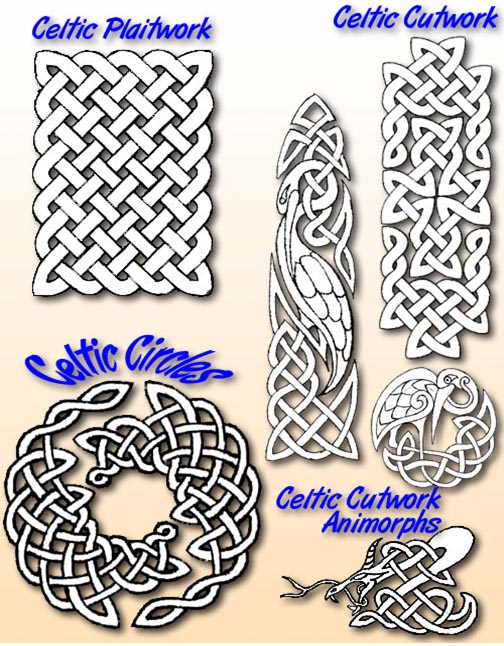
Celtic Line Drawing for Engravers,
by Tom Sterling
From its roots in the mysterious and unwritten distant past of Celtic art and ornament, Tom Sterling provides a series of tutorials on Celtic Line Drawing, concentrating on contemporary methods designed for engravers. You don’t need to know how to draw or have well-developed artistic skills to be a complete success. These methods are simple, yet provide spectacular results - YOU CAN DO THIS!

Needing nothing more than pencil, paper and a desire to learn, you can create complex Celtic designs in a very short time - hours, not days or weeks.


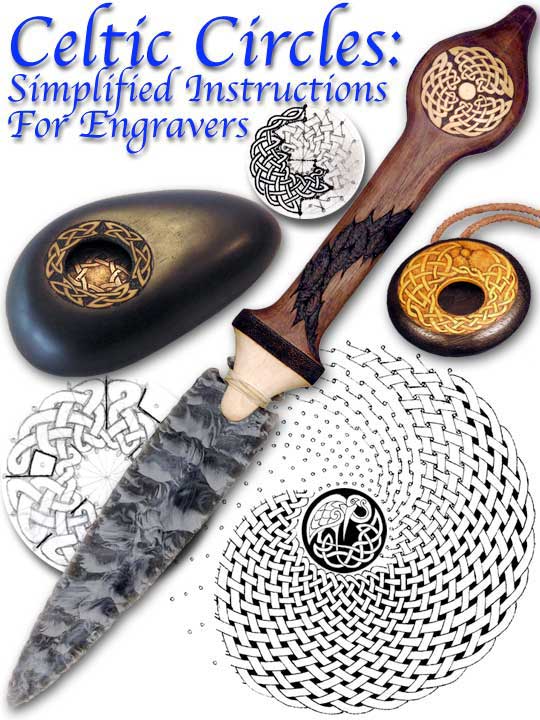
Part 1: Celtic Plaitwork
is available for free, and is the basis for the following Part 2: Celtic Cutwork, and Part 3: Celtic Circles. If you enjoy Part 1: Celtic Plaitwork, then you’re ready for the far more spectacular results in Part 2 and Part 3.

Part 1: Celtic Plaitwork will teach the basic method of “weaving” through a simple system of circles and lines, creating blocks of perfectly woven Celtic ribbons. Part 1 is free Click Here to view

Part 2: Celtic Cutwork explores the heart of contemporary Celtic interlaced ribbons, extending the system of circles and lines. Cutwork is where Celtic Line Drawing comes alive. We’ll also develop Celtic patterns, fitting them on knife shapes for engraving, and discovering simple methods for using computer illustration programs like Photoshop for cleaning up, scaling and fitting our drawn and scanned images for transfer to metal. In addition, we’ll develop Celtic Animorphs (animal images) using these contemporary Celtic techniques. And, finally, we’ll examine how to develop Celtic borders and develop engraving strategies for optimum cutting.


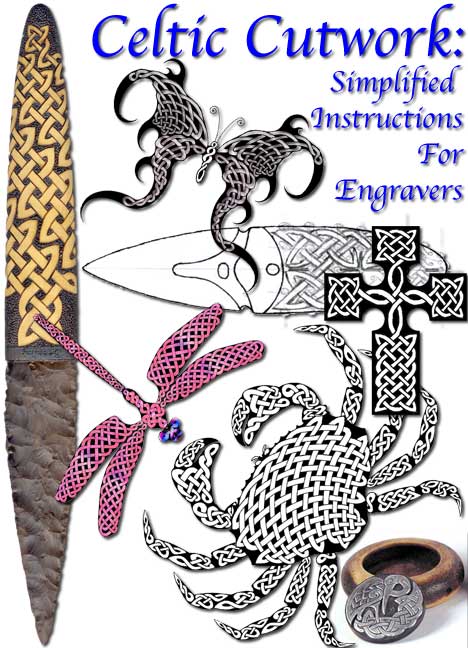
Part 3: Celtic Circles will extend even further our simple line drawing concepts. We’ll create circular Celtic designs and find out how to work our circular designs into ovals. We’ll examine how to draw Celtic designs directly on complex 3-dimensional surfaces, ready for engraving.
Approx. 9000 words (counting all three parts) approx. 100 images in parts 2 and 3 combined.
Parts 2 and 3 or Celtic Line Drawing for Engravers - Price $10 Purchase by selecting the tutorial here After purchase you will be able to see the tutorial at this link.
Celtic Line Drawing Tutorial
Reply With Quote
Reply

Bookmarks

Thread Tools

Posting Conduct
You may not post new threads
You may not post replies
You may not post attachments
You may not edit your posts

BB code is On
Smilies are On
[IMG] code is On
HTML code is On

Forum Jump


All times are GMT -6. The time now is 12:13 AM.


Powered by vBulletin® Version 3.8.6
Copyright ©2000 - 2024, Jelsoft Enterprises Ltd.